Friday, September 28, 2012

Mobile Turkey Coop


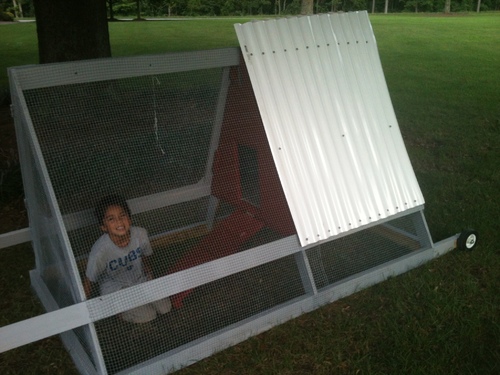
A mobile Turkey/Chicken Coop fit for a princess!  

Full credit for this design goes to Harvey Ussery and his great book, The Small-Scale Poultry Flock: An All-Natural Approach to Raising Chickens and Other Fowl for Home and Market Growers, which contains the plans we used.


It always seems to start with a square (or at least a square rectangle).  Measured on the diagonals.  This is 9' front to back and 8'3" side to side.  Looking back on this, I should have just made it 10' long, as I ended up using 2' wide plastic roofing panels, rather than the 3' wide metal roofing the author used.


With this coop, I took the extra time to ensure it was also square up to the ridge beam.  This saved alot of hassle, since roof panels went on without being crooked.


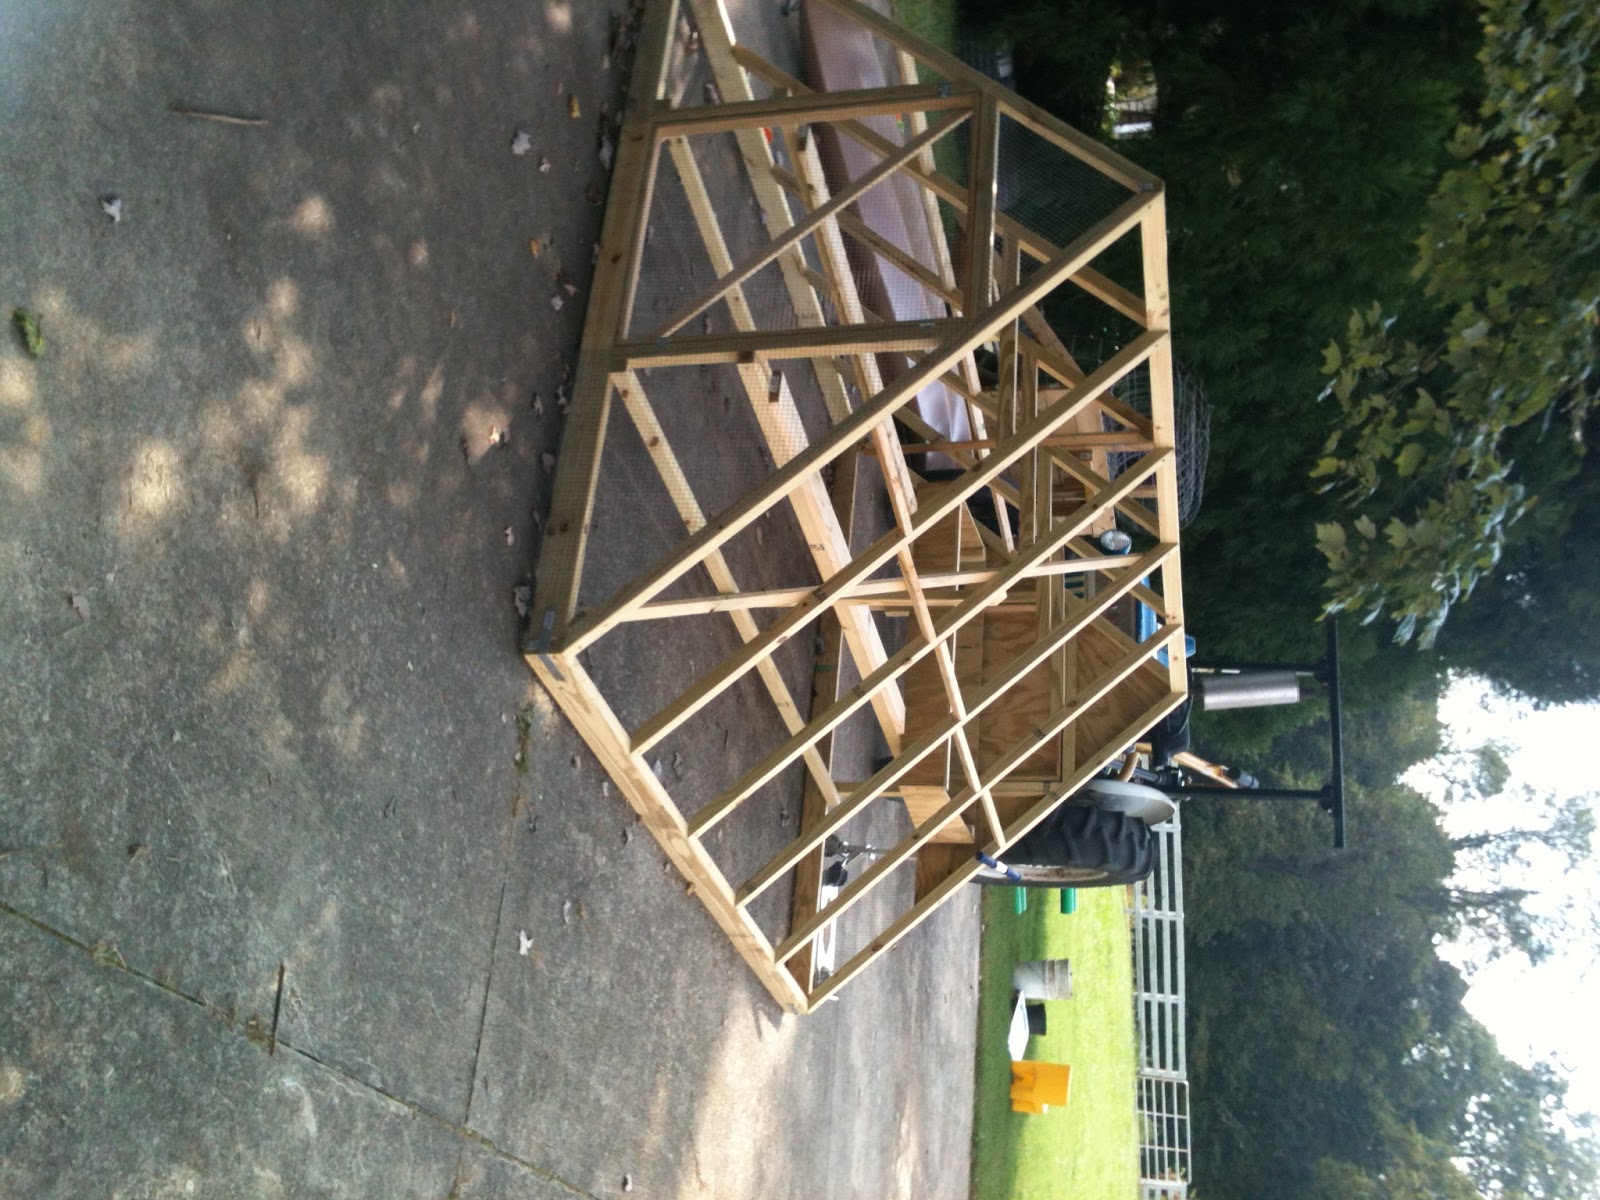
Add more rafters and 2 stringers from front to back.


Frame in the opening for the door in front and the nest box in back.  Note the 1x2 furring strips used on the rafters to keep them nice and square.  This also really stiffens up the structure.


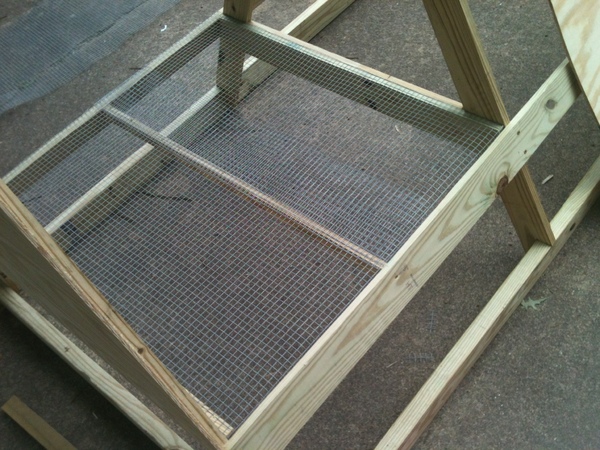
Here's the nestbox frame, which sits on the roosts, that you can see in the next photo.  The bottom of the nestbox was covered with 1/2" hardware cloth to allow water and dirt to drain out.


Here you can see the back wall on the nest box, which includes a rectangular door above it for easy access. There is blocking between the rafters and collar ties, which perform double duty as additional roosts and places to hang water and food.  Since we are housing turkeys, we made the roosting bars 4" wide, which is supposed to help prevent foot/leg problems.


 Dylan took care of covering the front and bottom of the back triangle walls with 1/2" hardware cloth.  He LOVES cutting that stuff so much that he tells me how many cuts it takes.  Only 800 wires to cut on this one....  He does appreciate the pneumatic stapler, after having to use a hammer and fence staples to attach poultry netting to the barn's petrified 2x4 lumber.  It's good to let kids learn the manual way of doing things before they get to use the power tools.  It builds character, and they can appreciate how dad built an entire clubhouse with handtools and lumber found on the side of the road--drug home by hand from 3-4 blocks away.


I'm finishing up the roof, and Dylan already has the wheels on.  These wheels are setup to be removable, so you can roll it into place, then drop it to the ground to exclude predators.  It's pretty heavy, so we chose to go with 4 wheels, rather than try to lift one end completely off the ground, like our smaller coop.  The roof is 6' on the diagonal, and luckily, the sheets of plastic roofing are sold in 8' and 12' pieces.  The 12' pieces cut in half pretty easily with heavy duty kitchen scissors (shhh! Don't tell my wife!), so there is no waste.


Here you can see the roosts, attached at the front and back of the coop, which some hangers from the rafters for extra support.  That's the nest box in the back and the door above it.


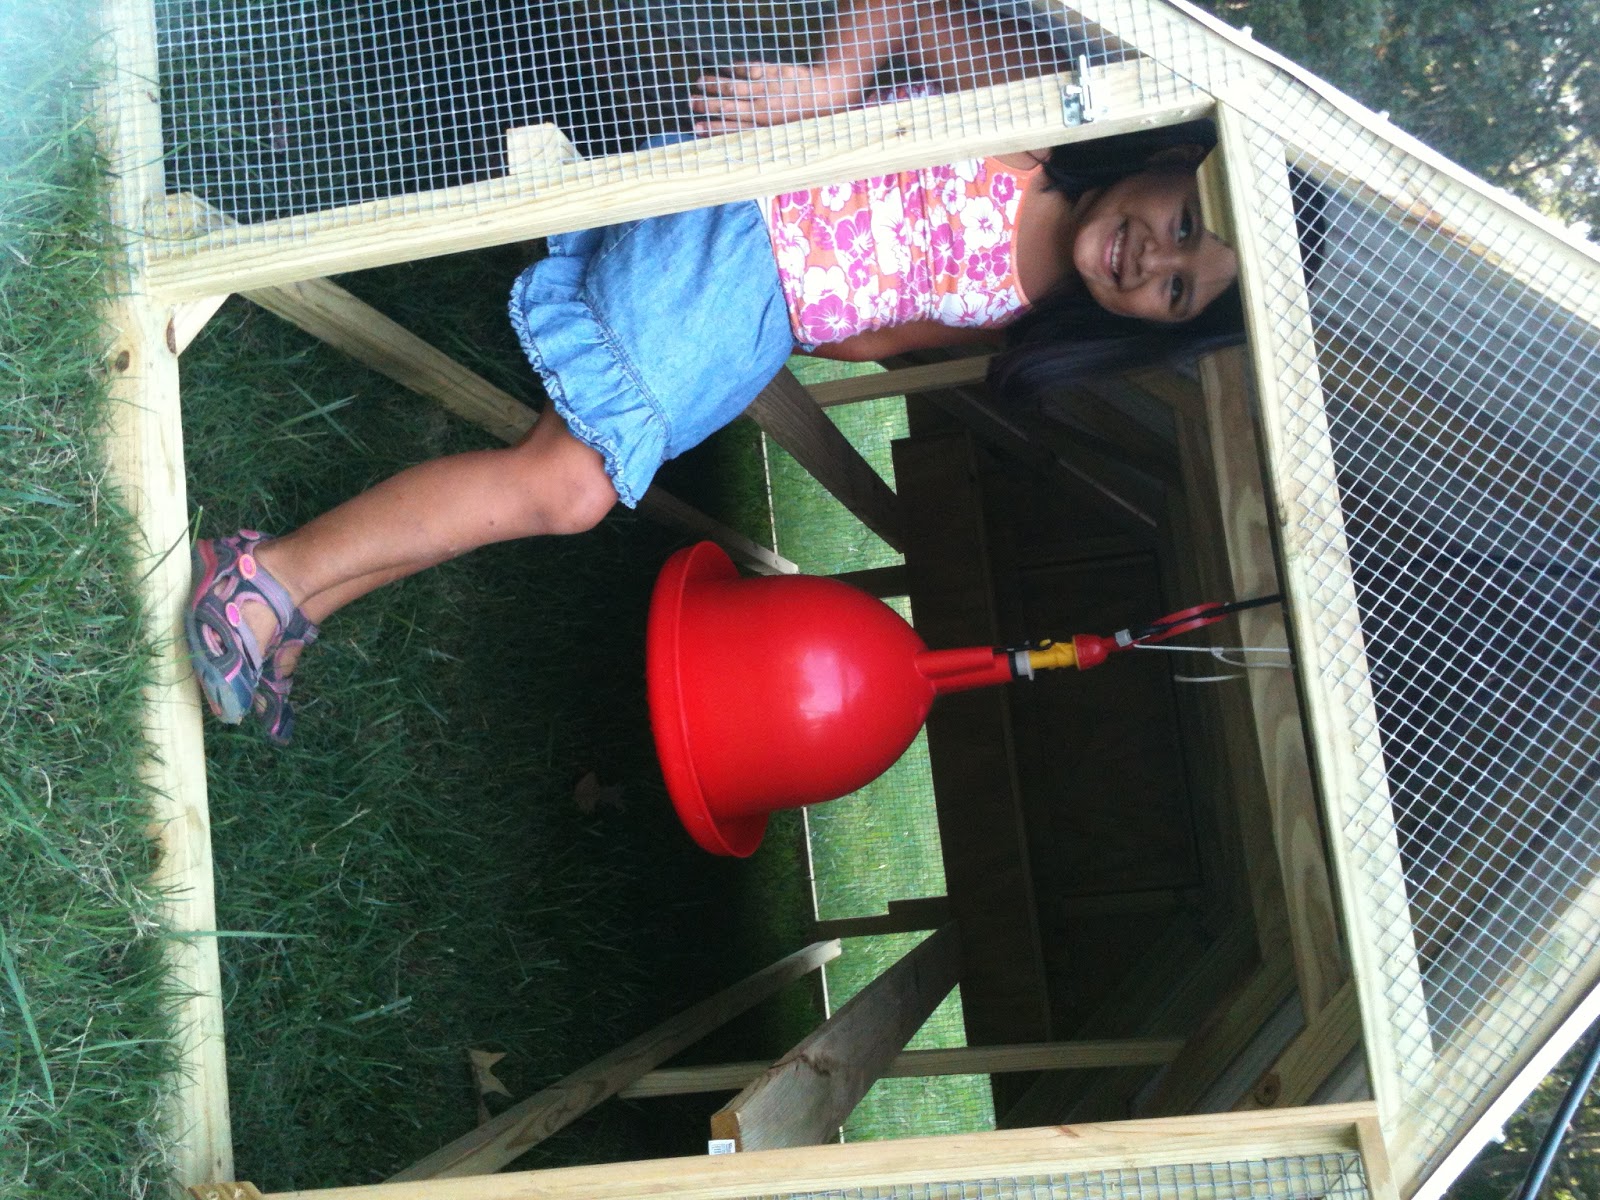
As pretty as that coop is, when it came time to "wire" up the automatic waterer, which requires the water pressure to be less than 8psi, the solution was to hang a bucket from a tripod from some dead saplings from the woods.  We hung the feeder right in front of the door to make it easy to refill.  

After a week of use, I'd recommend installing wire mesh on the collar tie that the feeder and waterer hang from to prevent roosting and pooping into the foot/water.   Dylan, grab the hammer, hardware cloth and fence staples!


For more up to date pictures, like us on Facebook at http://www.facebook.com/FiveHensFarm

Friday, July 20, 2012

Our first Mobile Chicken Coop

Upon the maturing of our Polish hen into a Polish rooster, we decided we needed a place to keep him segregated to control the spread of his fertility.  Thus launched the project to build our first mobile chicken coop.  Here's the finished product.  See below for more pictures of the build.


It all starts with a nice square foundation.  We measured corner to corner to ensure the base was square.  The base is 8' x 4' (with technically a 7' x 4' enclosure).  The extra foot was used for the "legs" sticking out to the left.  Those will receive wheels and allow the crossbar to be lifted higher off the ground, than if the wheels were directly under or in front of them.


We then threw caution to the wind and eye-balled the sides as square....this will later come back to haunt me.  Here I am, more concerned about the width of the the enclosed portion of the coop, than the fact that the base to ridge is not quite square.

Attaching the arms to the coop.  These will make it easier to move without cracking your shins on the coop.  These also make up the frame of the floor of the elevated, enclosed coop.  The top of the floor is about 18" off the ground.  This provides built in shade (under the enclosed portion of the coop), when the coop is in the sun, yet allows for a breeze to blow through.


We used 1/2" hardware cloth for the floor of the enclosed portion of the coop, with a center joist for added stability.  While we initially intended on putting wood chips on the floor of the enclosed coop, there is far less mess, if you just leave it bare and let the dropping drop through as they dry (or spray them out with a hose).

Then we apparently forgot to take pictures and enclosed the coop and added a door that lowers via a string.  The left side is hinged for easy access by humans to the enclosed coop.


Then, Dylan volunteered to paint the whole thing in primer.  He really enjoys painting.  The open side of the enclosed coop will be covered with plastic roofing, so no need to add weight here.  I debated covering it with hardware cloth for added security, but I guess we'll see how long the 25 year plastic roofing will last.


 Here you can see the wheels attached.  Notice that I cut the 2x4 at an angle to allow for more ground clearance where the wheel contacts the ground--yet, the coop lays perfectly flat when it's not lifted.


We put a nice coat of barn red on the front and back of the enclosed portion of the coop.  You can also see the 3rd door to the open area of the coop.  The framed door has reinforced corners with plywood.  I'm not sure this was necessary, being that it's getting covered in 1/2" hardware cloth, but it made me feel better.


Then we added plastic roofing on the enclosed coop and 1/2" hardware cloth to cover all openings.  You may think that hardware cloth is excessive and that regular poultry netting would be just fine.  Our experience shows that a chicken that decides to sleep to close to the poultry netting will have it's head removed by a raccoon or opossum.


I didn't use any kind of ridge cap, I just offset the two sides of corrugated roofing so that they matched up tightly at the top.  Any rain getting in will likely just run right down the inside of the roof and out the bottom.  We also installed a nest box in the back corner of the enclosed coop on the side with the door.


I do wish we had built it a few feet longer, or used a vertically sliding door.  As it is, there is only room for a hanging waterer,and I'd like to have room for a hanging, covered feeder.  Instead, we sprinkle in feed every day, which avoids the issue of feed getting wet when it rains.  It also encourages scratching for other food, such as bugs.


Thursday, April 26, 2012

Deannexation Reversed. Rezoned with Variance

Quick, long overdue update.  The Deannexation was quickly reversed a day later due to the fact that they technically weren't allowed to vote on it.  During the following days, there were several meetings asking us to consider rezoning with a variance.  After much deliberation, we thought it would be better to work with them (now that they were willing to work with us), and we came to an agreement.

We rezoned, without much debate into "Restricted Agricultural" zone.  This allows a density of 2 animals per acre of pasture, but still disallows the keeping of fowl or swine.

Our Special Use/Variance request was approved for the following:

1) Fowl at an average density of 10 fowl per acre of property (pasture or woodlands)
2) Swine at a density of 1 swine per 3 acres of property (pasture or woodlands)
3) Honeybees (apiary)
4) Roadside stand for farm products (parking provided on our property)
5) Farm Tours, U-Pick-It operations, and seasonal outdoor mazes (long term plans)

While there were no specific restrictions against honeybees at the time, the recent uproar about honeybees in Forsyth county prompted us to include this "just in case".

This was all approved on April 26, 2012.

Finally approved.  Isabel is happy!


Wednesday, March 7, 2012

Deannexation Complete

Life can now move forward.  In a 2-1 vote, the City of Dawsonville allowed us to deannex from the city.  This returns us to the Residential Agriculture (RA) zoning district of the county.  We were disappointed that they were not willing to update their zoning ordinance to allow hens, but glad they allowed our farm on the outskirts of town to deannex back to the county. 

http://www.dawsonnews.com/section/4/article/9028/